

How To Remove Air Bag Suspension
Air ride suspensions are common on heavy-duty trucks, luxury SUVs, and large sedans. The air ride break system replaces the traditional daze/strut/jump setup with a series of air bags that sit in between the ride axle and the body of the vehicle. The suspension air bag is like a heavy-duty balloon that is filled with air supplied from an onboard compressor. As the vehicle takes on more weight, a series of sensors trigger the air compressor to provide more air pressure for the bag to back up this weight, or to drain some air depending on the circumstance.
Because it is a pneumatic device and prone to exposure to farthermost elements and potentially beingness hit by sharp objects, it is possible for the break air bags to suspension or wear out before the vehicle hits 100,000 miles. Some of the more than common symptoms of worn out or broken air bags include the onboard air compressor/pump continually cycling on and off, the vehicle sagging on one side, or the suspension feeling spongy and unresponsive.
Part 1 of 1: Replacing the suspension air bags
Materials Needed
- Combination wrench set and extensions
- Apartment bract screwdriver
- Locking pliers
- Pry bar
- Replacement suspension air bags– e'er replace in pairs
- Safe equipment including safety glasses and gloves
- Socket wrench set (verify standard or metric before starting the chore)
- Work light
Pace i: Remove ability from the vehicle. Before taking off any parts, disconnect power from the battery. Remove the positive and negative terminals from the battery.
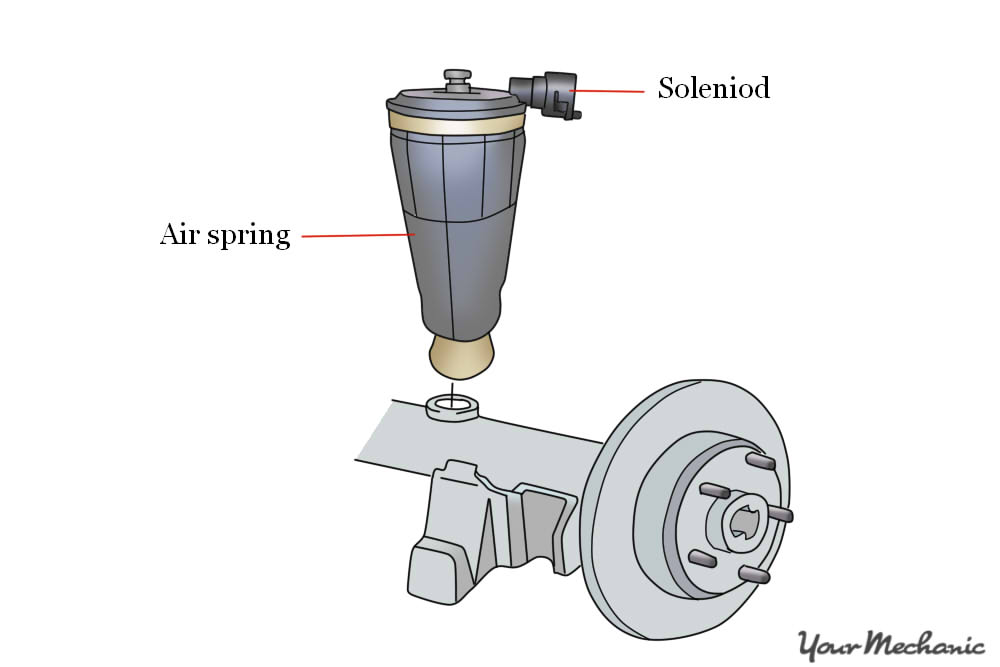
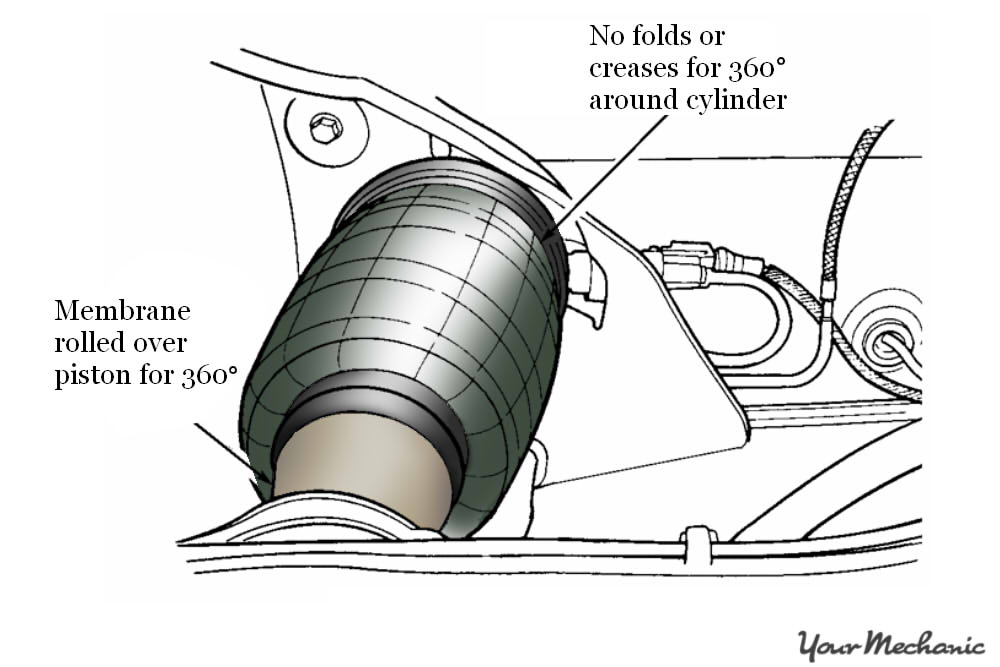
Step 2: Review the service transmission for the air bag connection locations. The diagram to a higher place shows the bones setup of most air bag suspensions. The air bag itself will exist connected to the body and to the rear axle. In order to gain access to the body connection, yous volition likely have to remove multiple interior components almost the rear seat or in the trunk.
Some of the common parts and pieces that need to be removed in order to gain access to the air purse upper connectedness include the rear seat, the rear floorboards, and the rear side interior panels. As always, refer to your service manual for verbal instructions.
- Warning: Make sure you accept removed whatever interior parts before you endeavor to raise your vehicle. Trying to complete this while the vehicle is on jack stands or on a hydraulic lift may crusade the vehicle to become unstable and fall off the elevator or jack stands.
Step iii: Raise the vehicle. You'll accept to raise the rear of the vehicle in club to remove the rear tires and the suspension air bags. If you take admission to a hydraulic lift, please use it. This job is much easier when you tin piece of work below the vehicle, specially when removing the lower clip connected to the beam.
If you need to use jacks, make certain to support the front bicycle with bike chocks. Only enter the vehicle to remove the top support prune if needed once the vehicle is on jacks or on the hydraulic lift.
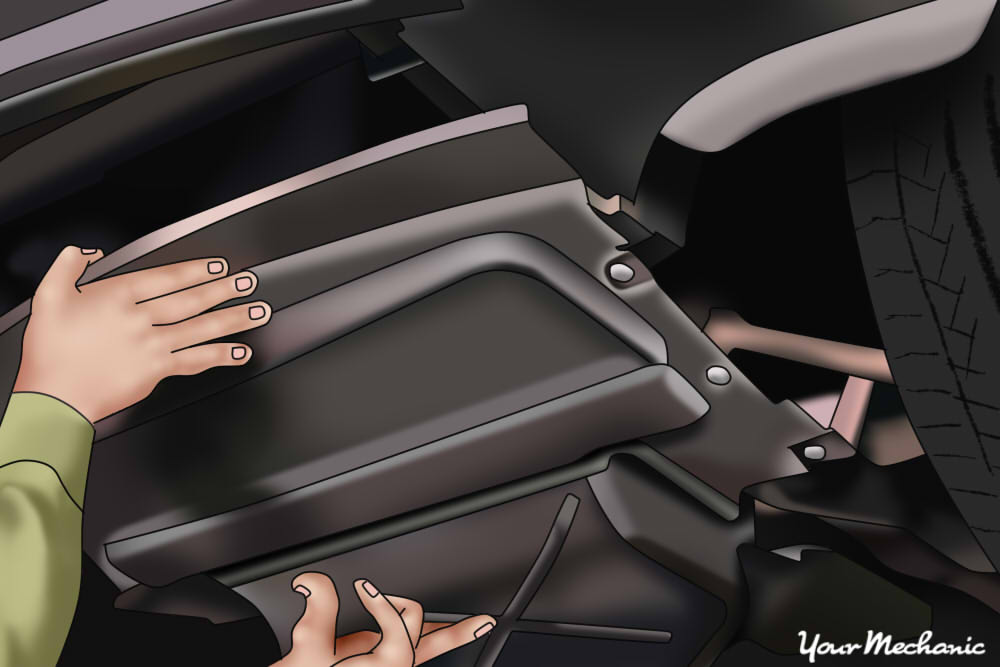
Step 4: Remove the lesser covers. On near cars and SUVs, the air compressor and air lines that connect to the suspension air bags volition be located underneath the undercarriage cover. Referring to your vehicle service manual, remove the bolts and clips on the side of the vehicle where the air compressor and line connections are located. Typically this is on the driver side.
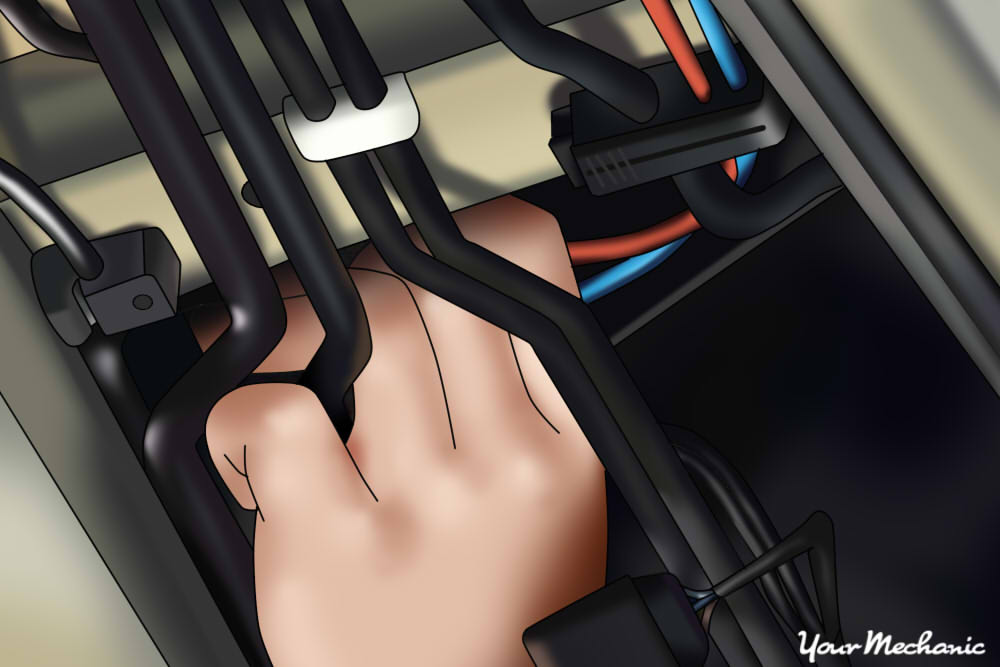
Step v: Remove the air lines connected to the passenger and driver side interruption air numberless. In one case y'all've removed the undercarriage covers, y'all will see a series of pneumatic lines, typically two unlike colors. The line on the right mitt side (passenger side) supplies air from the compressor to the rider side air purse, and likewise with the ane on the left (driver side).
These lines are typically nylon connections, then you need to carefully remove them. Using a nylon pair of pliers, advisedly loosen the air supply line on the driver side first. As you loosen the line, air volition brainstorm to leak. Do not remove the line all at once, as it may cause damage to the connection.
Slowly let the air bleed from each line. Equally the air pressure decreases, keep to slowly unscrew the line connection until the air is completely drained from the system.
By removing ability to the vehicle, you'll have close off the air compressor'southward ability to recharge the system, and then you lot don't take to unplug the onboard compressor. Remove both air line connections completely before proceeding.
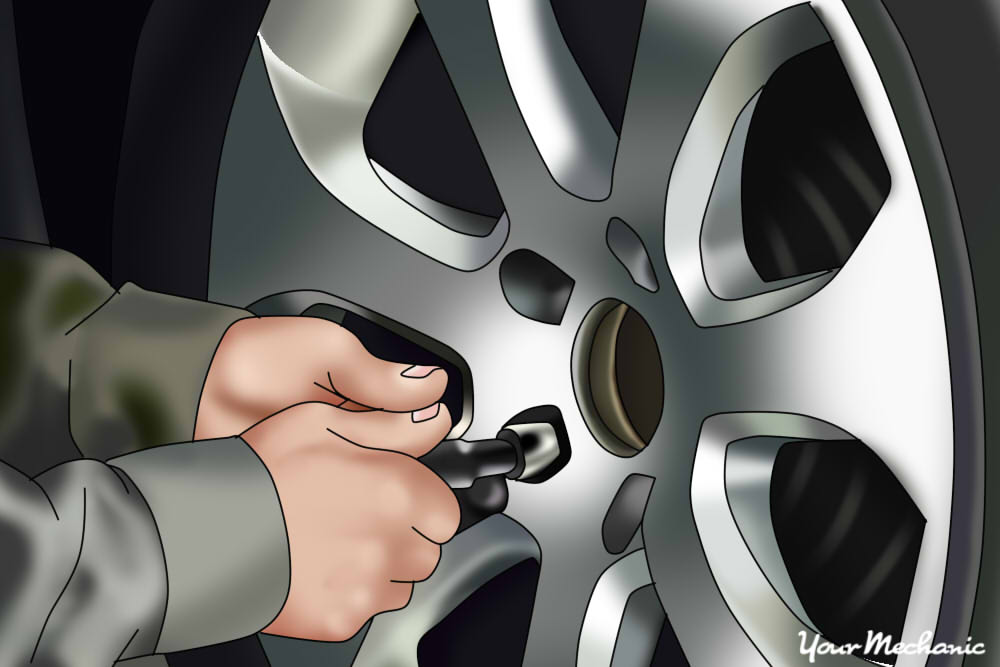
Step half dozen: Remove the driver and rider side rear tires. Later on yous've disconnected the air supply lines underneath the vehicle, remove the driver and passenger side rear tires. Y'all'll demand to have them removed in guild to admission the suspension air bags.
Step seven: Remove the bottom interruption air bag connexion. Typically, the bottom air bag connection is secured to the axle with a cotter pivot or a commodities.
As ever, refer to your service transmission for the verbal instructions on how to remove the bottom air bag connection.
You should remove the lesser commencement, as information technology will permit the bag to compress more once you remove the peak connectedness in the next footstep.
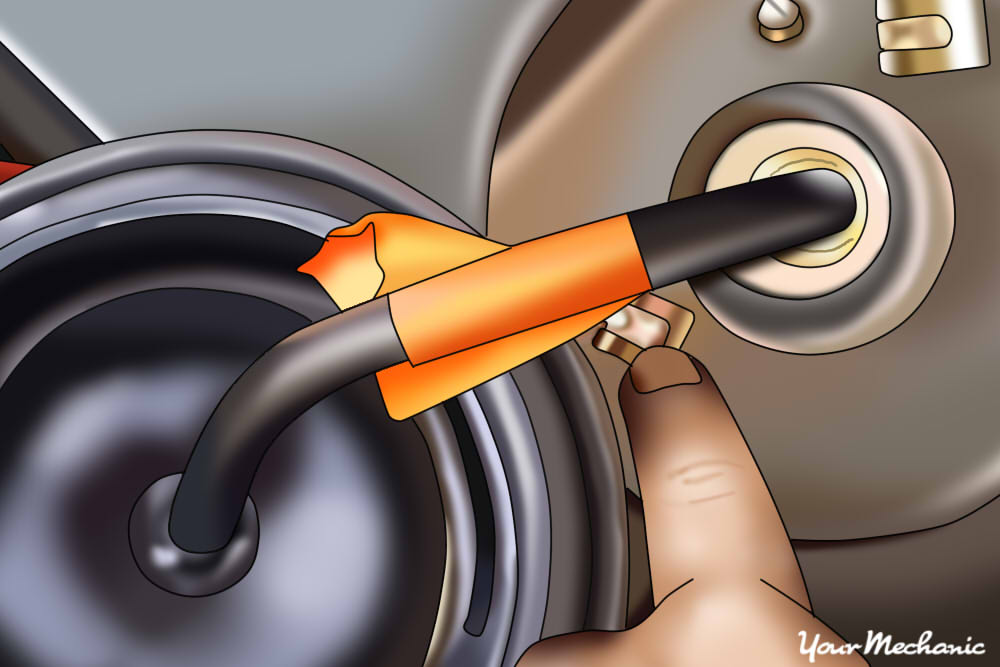
Step 8: Drain the air and remove the peak air bag connection. Although you may have drained the air lines in Pace v above, there will notwithstanding exist air inside the bag. Drain the air handbag by offset removing the rut encompass on summit of the connection.
One time the embrace has been removed, slowly pull the air supply line from the air bag connection. Equally air starts to flow, stop pulling on the line. Allow it drain slowly.
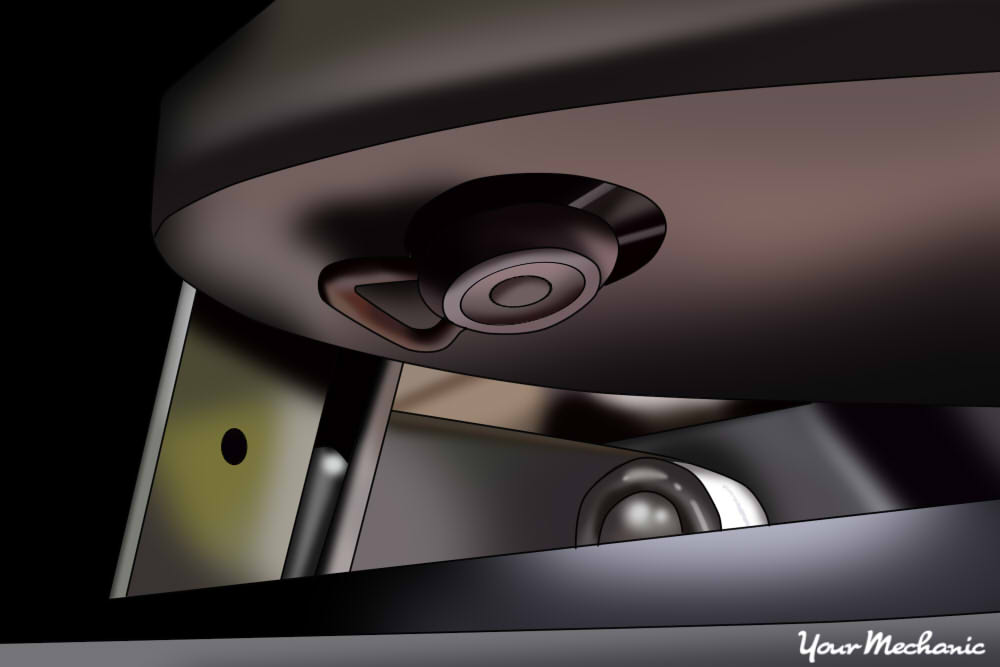
Afterwards the air has been drained from the bag, remove the clips (indicated in the above epitome) or bolts that secure the air bag onto the body of the vehicle. Refer to your service manual for exact instructions on how to complete this step.
Step 9: Remove the erstwhile air bag from the vehicle. When the air purse has been drained and y'all take the vehicle on jack stands, the handbag itself will be adequately simple to remove.
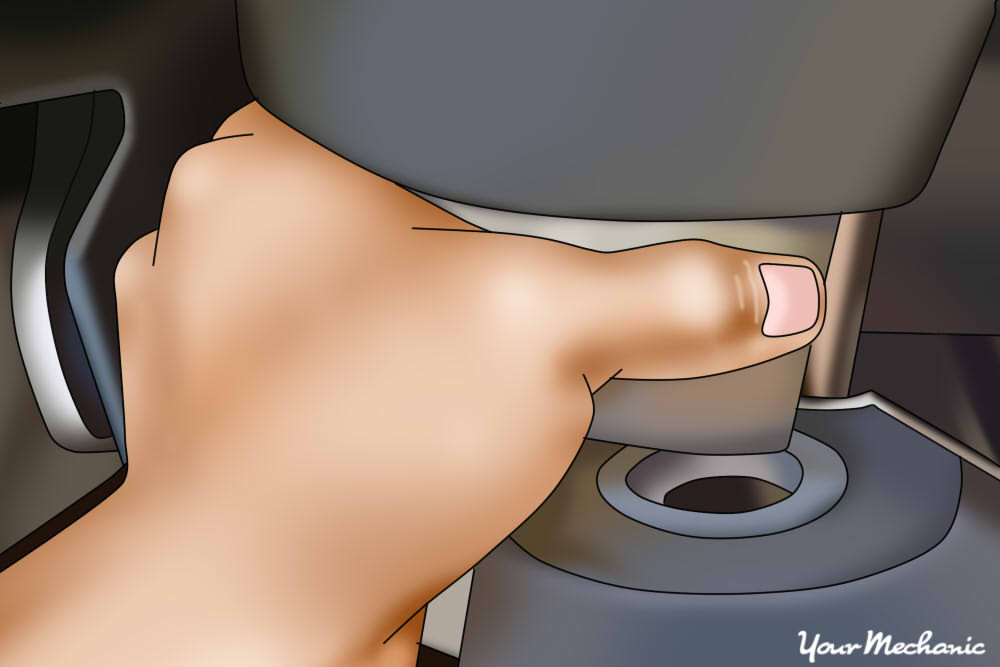
First, collapse the air bag by holding the lesser of the pocketbook with your hand and pressing it upwards.
Second, once the bag has compressed, remove the lesser support off the axle every bit shown in the image above.
3rd, after the bottom has been removed, pull down on the top of the air bag to remove it from the top connection. Pull the air handbag through the wheel well to remove information technology from the vehicle.
Step 10: Install the new air pocketbook. The process for installing a new air pocketbook is in reverse of the removal. There is usually no prep work to complete earlier you install the new air bag, but you need to practise this one side at a fourth dimension and consummate the procedure so you don't miss whatever steps.
It'due south important to call up that you lot demand to supervene upon both air numberless before completing this task. Follow these basic steps, but refer to your service manual for specific instructions.
Insert the new air pocketbook in between the beam and upper connection. Slide the upper connection into the back up bracket. Slide the rear connection into the support bracket on the beam. Secure the upper connectedness by tightening the bolts or inserting the clips. Secure the air line to the upper portion of the air bag. Secure the heat shield or air bag cover.
Secure the lesser of the air purse by reinstalling the cotter pin or the bolts underneath the bracket to the axle. Reconnect the air line connections underneath the torso that were removed in Step 5. Reconnect the bottom floorboards or undercarriage covers.
Reinstall the rear tires and torque to the manufacturer'south recommended settings. Reconnect the bombardment.
Stride 11: Commencement the vehicle and permit air bags fill. Before yous lower the vehicle, make sure to start the engine to activate the air compressor. This volition allow the air bags to make full while there is no load on the air bags. This volition reduce pinching of the air bag and ensure the system is fully engaged when you lower weight onto the interruption.
Footstep 12: Lower the vehicle and inspect the air bags. As the bags fill, jack the vehicle upwards and remove the jack stands.
Slowly lower the vehicle in one case the air compressor stops running. This means the air bags are filled to the recommended inflation.
Every bit you lower the vehicle, it will be common for the air compressor to restart. In one case the vehicle has been lowered, check the air line connections and the numberless themselves for any leaks.
If you've read this instructional article and are not 100% confident in completing this task on your own, contact the professional person and local ASE certified mechanics at YourMechanic. They have the correct knowledge, experience and tools to consummate a intermission air bag replacement job very easily and affordably.
The statements expressed higher up are only for informational purposes and should exist independently verified. Please see our terms of service for more details
Source: https://www.yourmechanic.com/article/how-to-replace-a-suspension-air-bag-by-tim-charlet
0 Response to "How To Remove Air Bag Suspension"
Post a Comment